


Weekend recipe: No-knead Sourdough
A veteran home baker shares her go-to bread
Earlier this week I spoke with my friend Brittany Wienke about the book New World Sourdough and her experiences learning how to make sourdough bread over several years. During our interview, she mentioned that she had gotten comfortable with sourdough by memorizing a recipe she found online and tweaking it to her preference.
For those who might have gone through a wild adventure with sourdough at the start of the pandemic last year and may have since given up; are still getting the hang of it; or just love to bake it; I wanted to share some more of Brittany’s reflections and tips for beginners, and offer her recipe. I hope hearing from another home baker about their journey will inspire you.
How many years have you had your starter?
At least five. My coworker Erica gave me some sourdough starter that she had...I think it entered my life at the right time because I finally had the maturity to realize how to do this was not gonna be something that happened overnight and I wasn’t gonna have instant success. I did not have that degree of patience when I was younger.
So I approached the task with patience, and told myself that if I could make really really great bread by the time I was 60 then I would be happy with myself. That was my thought. It didn’t take that long. I think because I gave myself such a long timeframe it enabled me to be gentle with myself. Because I had some spectacular failures along the way.
What resources did you use to get into sourdough baking?
The New York Times cooking website has a no-knead sourdough bread—the Jim Lahey recipe adapted by Sam Sifton. I used that recipe the same time I made the decision to approach this project as a lifelong project. I worked from that one recipe for a long time. I was like “I’m gonna learn this recipe. I’m gonna perfect this bread really well.” ...I ended up memorizing the New York Times proportions and steps. And then started tweaking it, slowly experimenting and doing things a little differently each time. Until eventually, I ended up with a recipe of my own doing. I have that memorized and when I want loaf of bread to have toast or sandwiches, I make that bread.
How often do you bake now? What’s your routine like?
I bake about once a week. When I’m doing my adaptation of the Jim Lahey recipe, I’ve baked that once a week for years. The process is, I would take the sourdough starter out of fridge in morning, I would refresh it, I would go to work, then I would come home and it would be ready to use. Then I would mix the dough, let it rise until 10 or 11pm, I would shape it, it would go in the refrigerator, then I would wake up early the next morning to bake it and that was it.
The proportion of ingredients stayed more or less the same, but I created a recipe that fit work life so I could do it any day of the week.
What advice would you give to any beginner?
I would recommend that people learn fun things to do with sourdough discard, like pancakes or scallion pancakes. Even if your loaf fails, you still get something tasty and immediate out of it. You don’t have to wait 12 hours to eat a discard pancake.
If you don’t have a Dutch oven, get one. Get a Dutch oven and get a scale. Those two things changed the game for my baking. [My first] sourdough starter recipe probably didn’t work because I didn’t use a scale. The Dutch oven is an indispensable tool. It creates an oven within an oven. It traps steam, which is what makes a bread crust really crispy and brown, and that nice blistering texture. You can get an enamel coated cast iron Dutch oven, but it doesn’t need to be that expensive. The Lodge black cast iron Dutch oven is inexpensive, for example.
I would encourage people to treat the whole thing as a fun science experiment and not to take it too seriously. It’s a pretty affordable hobby: you can buy a five-pound bag of flour and make three or four loaves of bread out of that depending on how much flour the recipe calls for. Aside from the equipment, it’s a low barrier to entry.
Brittany’s No-Knead Sourdough
Makes 1 medium-sized loaf

Equipment needed:
scale
bowl for mixing
banneton (proofing basket) or a medium-size bowl and clean dishcloth for proofing
Dutch oven or baking sheet
water spritzer (optional)
razor or serrated knife for scoring
Ingredients:
300g tepid water
140g sourdough starter
7-10g salt (I aim for 7 but usually overshoot, and haven't noticed any ill effects from having ~10g or so)
430g flour (depending on the flour I use and the weather—if it's a humid day I will use a bit more flour, 410g or so, and on a dry day with low humidity, I might do 390g. I usually use about 400g white all purpose or bread flour, and then 30g whole wheat or rye or whatever I have, but you can use 100% all purpose or bread flour.)
15g (approx 2 tablespoons) of cornmeal
You can also put in seeds, dried fruits, spices, whole garlic cloves, etc.
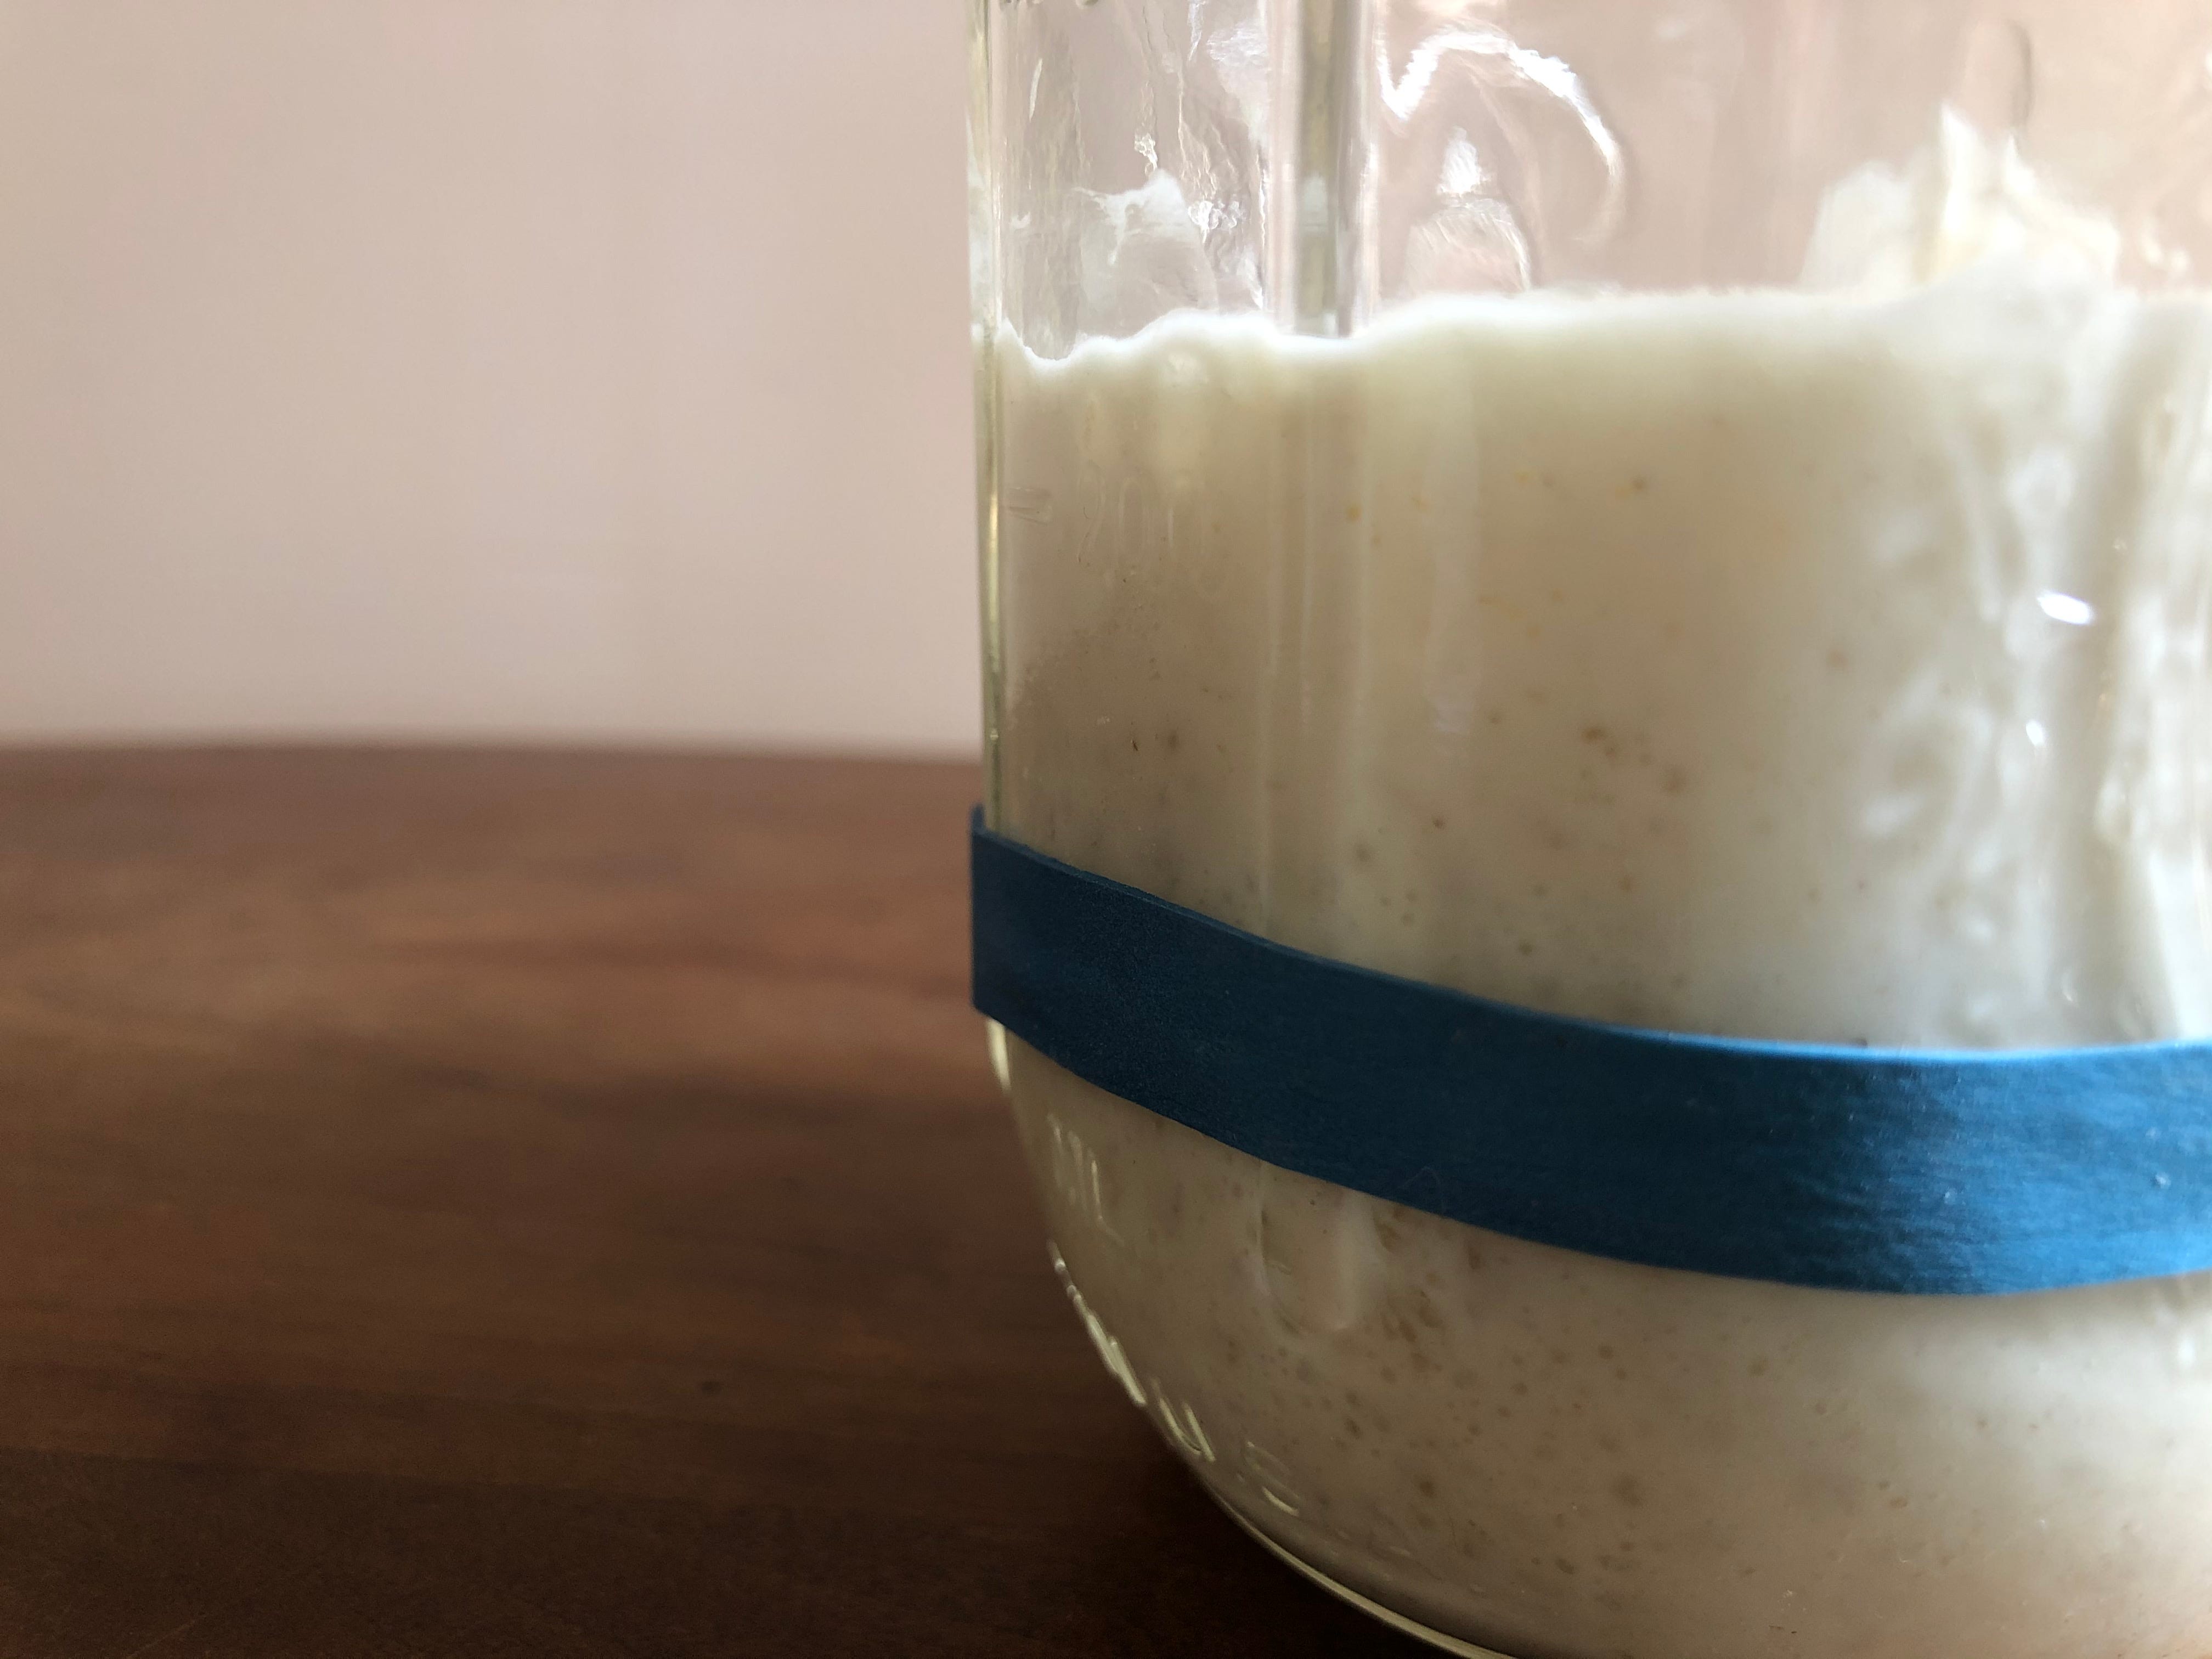
A note on the starter: Starter needs to “ripen,” or expand at room temperature, before it’s ready for baking. I take my starter out of the refrigerator and let it roughly double in size before I start mixing. You can measure this by scooping out 140g of starter into a clear glass jar, giving it a shake to level it out, then putting a rubber band around the outside of the jar at the spot the starter comes up to. You’ll know the starter is ready when it’s passed the rubber band by about double.
1. Mix the dough: Mix water and sourdough starter together in a medium bowl and stir together to dissolve. I use a fork for this, because it helps break up the goopy strands of starter. Add salt and stir to dissolve. Add flour, mix until all the flour is wet. I use my hands for this and repeatedly squeeze the mixture until it comes together. It will look shaggy and feel sticky.

2. Autolyse: Let sit for 30 minutes, then use your fist to remix the dough. If you want to include seeds, nuts, herbs, fruits, or spices into your dough, this is when you would add them. Keep in mind if you're adding things like cheese or olives that your moisture content will increase, so compensate with a touch more flour in step 1.
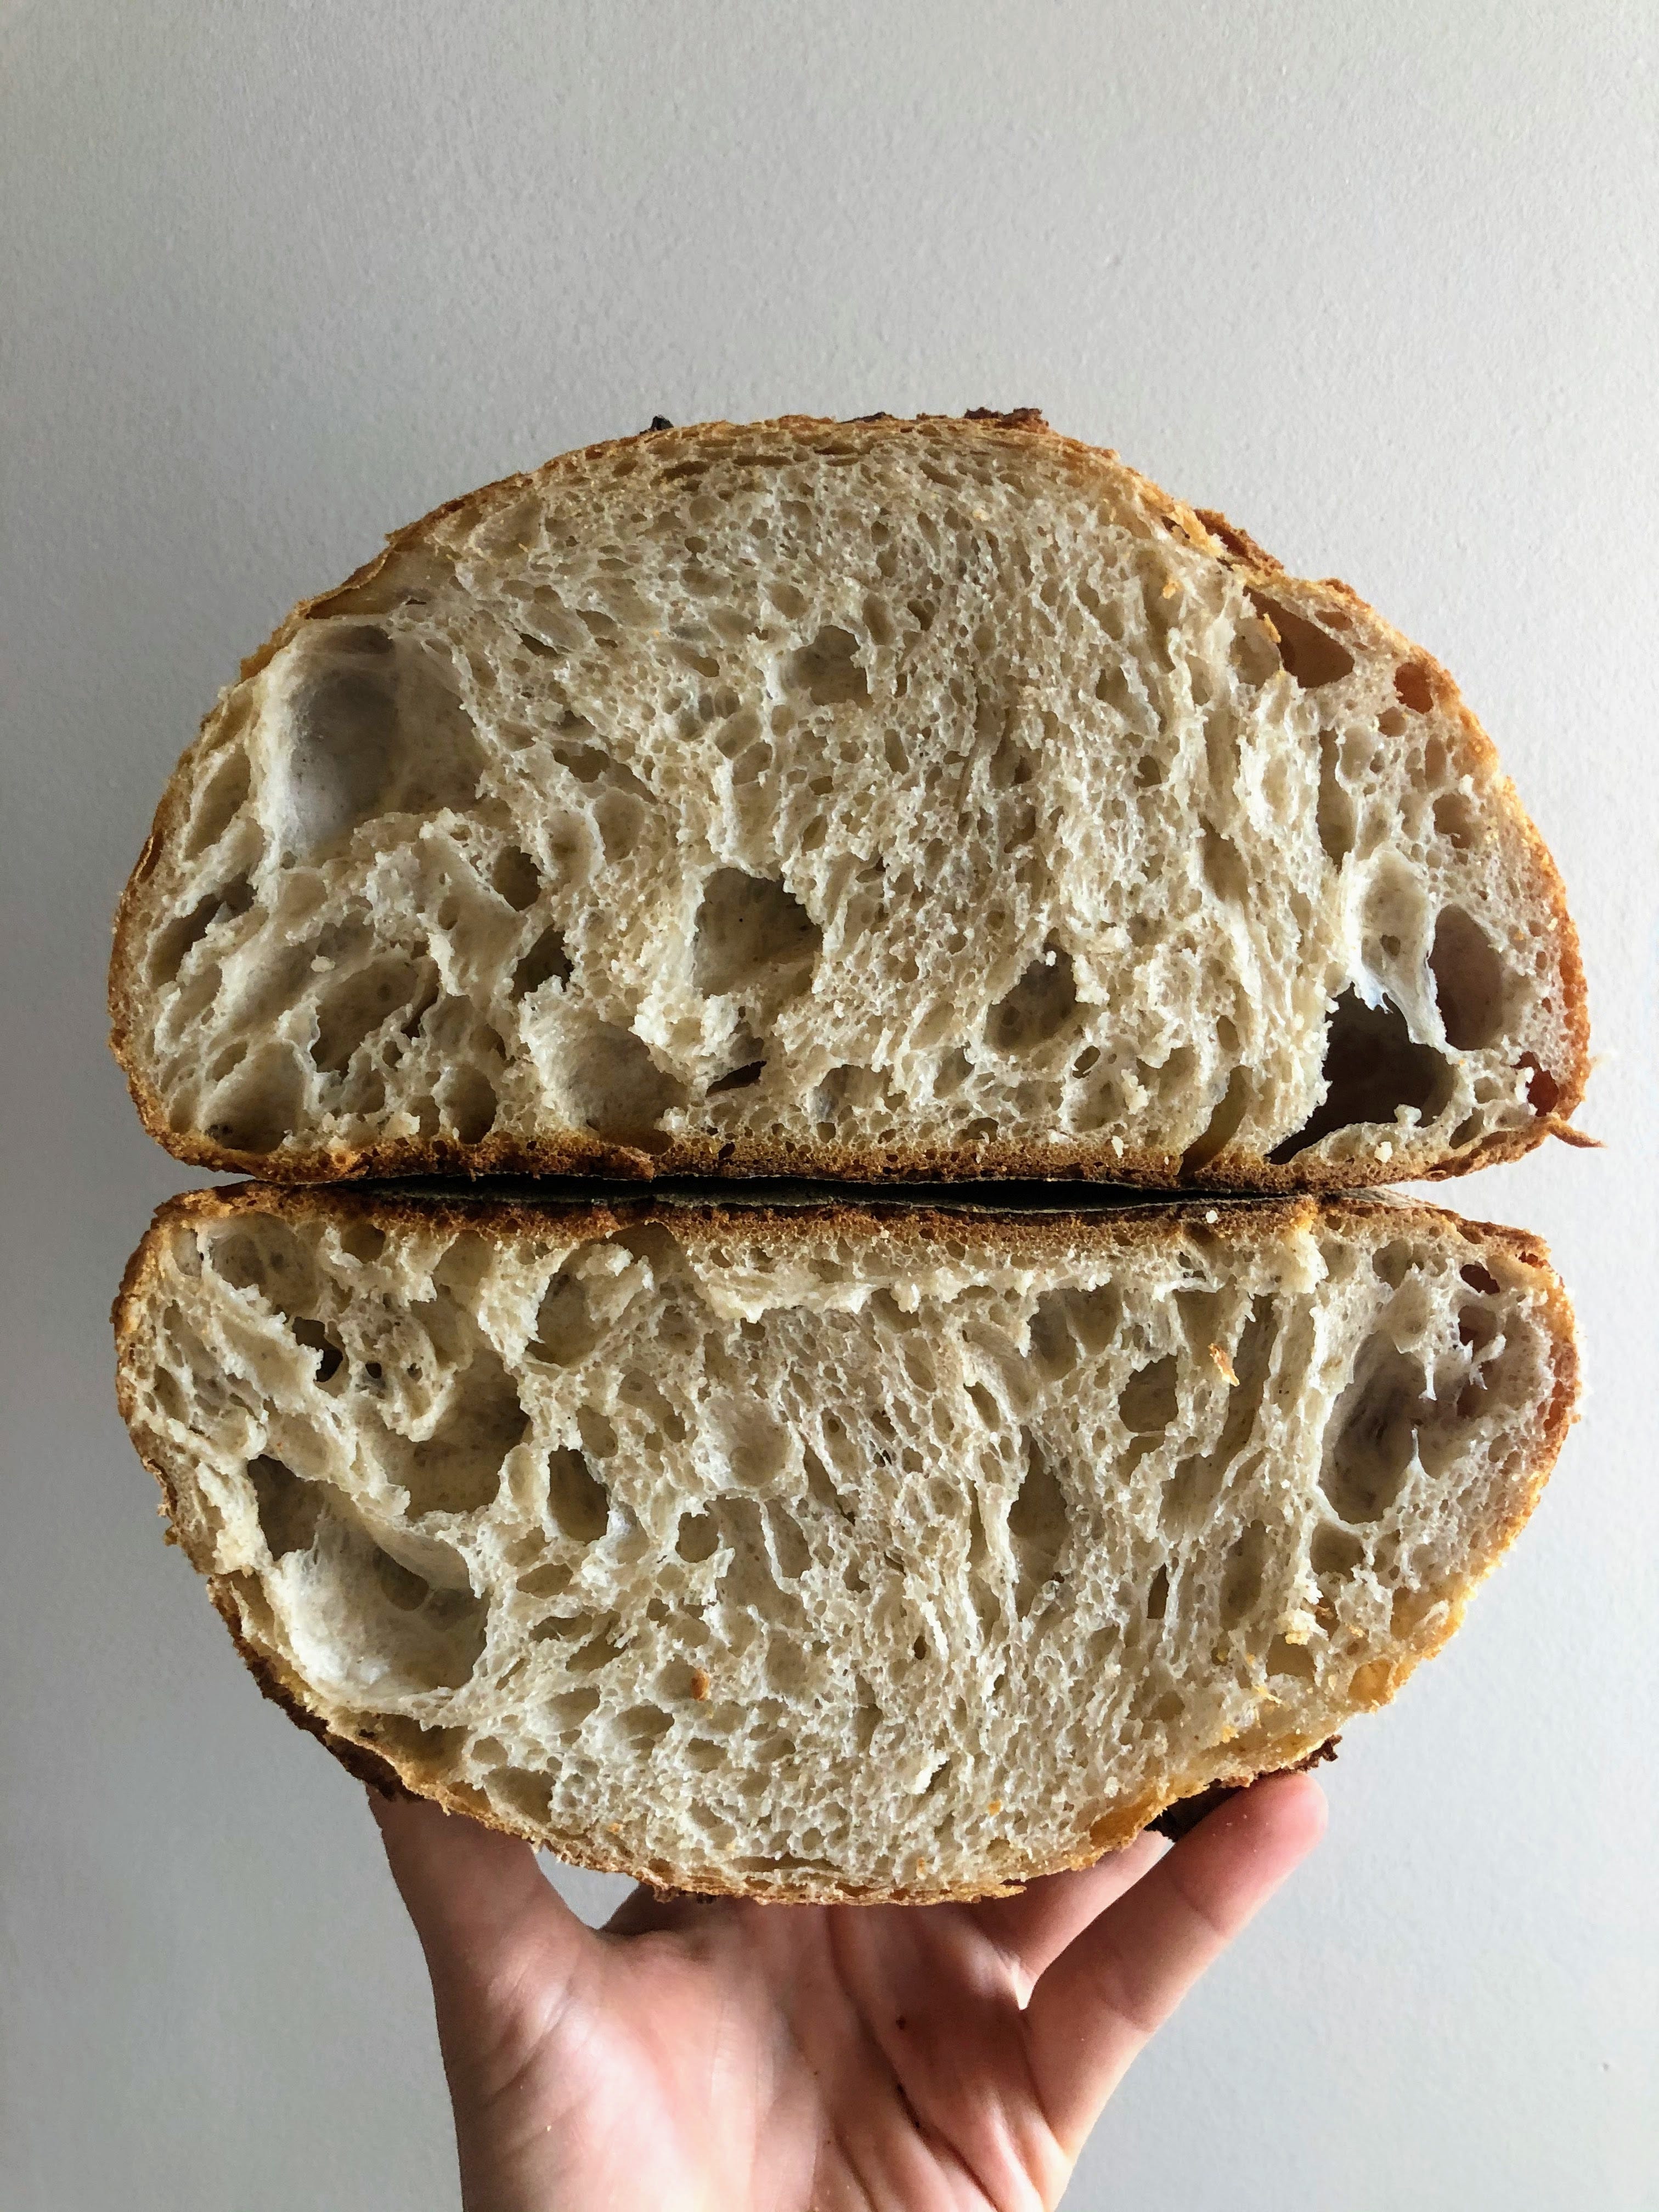
This is the autolyse period, wherein the flour is gently hydrated and gluten begins to develop. Strong gluten strands are what allow the dough to expand and capture gases in the oven, creating that lovely holey structure.
3. First proof: Let it sit in the bowl, covered, for 4-6 hours until roughly doubled in size. On a warmer day, it will take less time; on a colder day, it will take more.

4. Stretch and fold: Turn out onto a lightly floured surface and do a series of 4 stretch and folds: take the top edge of the dough, stretch it away from you, and fold it towards the center. Rotate the dough 90 degrees, and repeat 3 more times. Use the tips of your fingers to pinch all edges together. You should end up with a round ball of dough.
5. Shape the dough: Flip the dough so the edges are facing down. Cup your palms and gently roll the dough towards you. Just like with the stretch and folds, turn the dough 90 degrees and use your palms to drag the dough towards you again.
This is called shaping, and the goal here is to eliminate any seams in the dough and to build surface tension. (By the way, if you watch the video I linked, do NOT de-gas your bread. That's considered passé now!)

6. Stretch and fold and shape again: Wait 10-20 minutes, and repeat steps 4 and 5: 4 stretch and folds, and one more shaping.
7. Proof in the fridge: Immediately after the second set of stretch and folds, put into a banneton dusted with flour or bowl lined with a dishcloth, cover, and put it in the fridge for at least 12 hours.
If you have whole wheat flour, that's really the best choice for dusting the banneton. I've found you have to use a LOT of all-purpose flour to keep the dough from sticking, whereas whole wheat flour acts like a layer between the cloth/banneton and dough.
8. Preheat your baking vessel: After 12-24 hours, put a Dutch oven in the oven at 500 degrees on the middle oven rack. Let it come to temp and then heat for at least 30 minutes.
This is to make sure the Dutch oven is properly hot and will start baking your bread immediately. If you don't have a Dutch oven, you can use a cast iron skillet or a regular ol' baking sheet—but your bread won't have the same shiny, blistered crust as it would if it were baked in a Dutch oven.
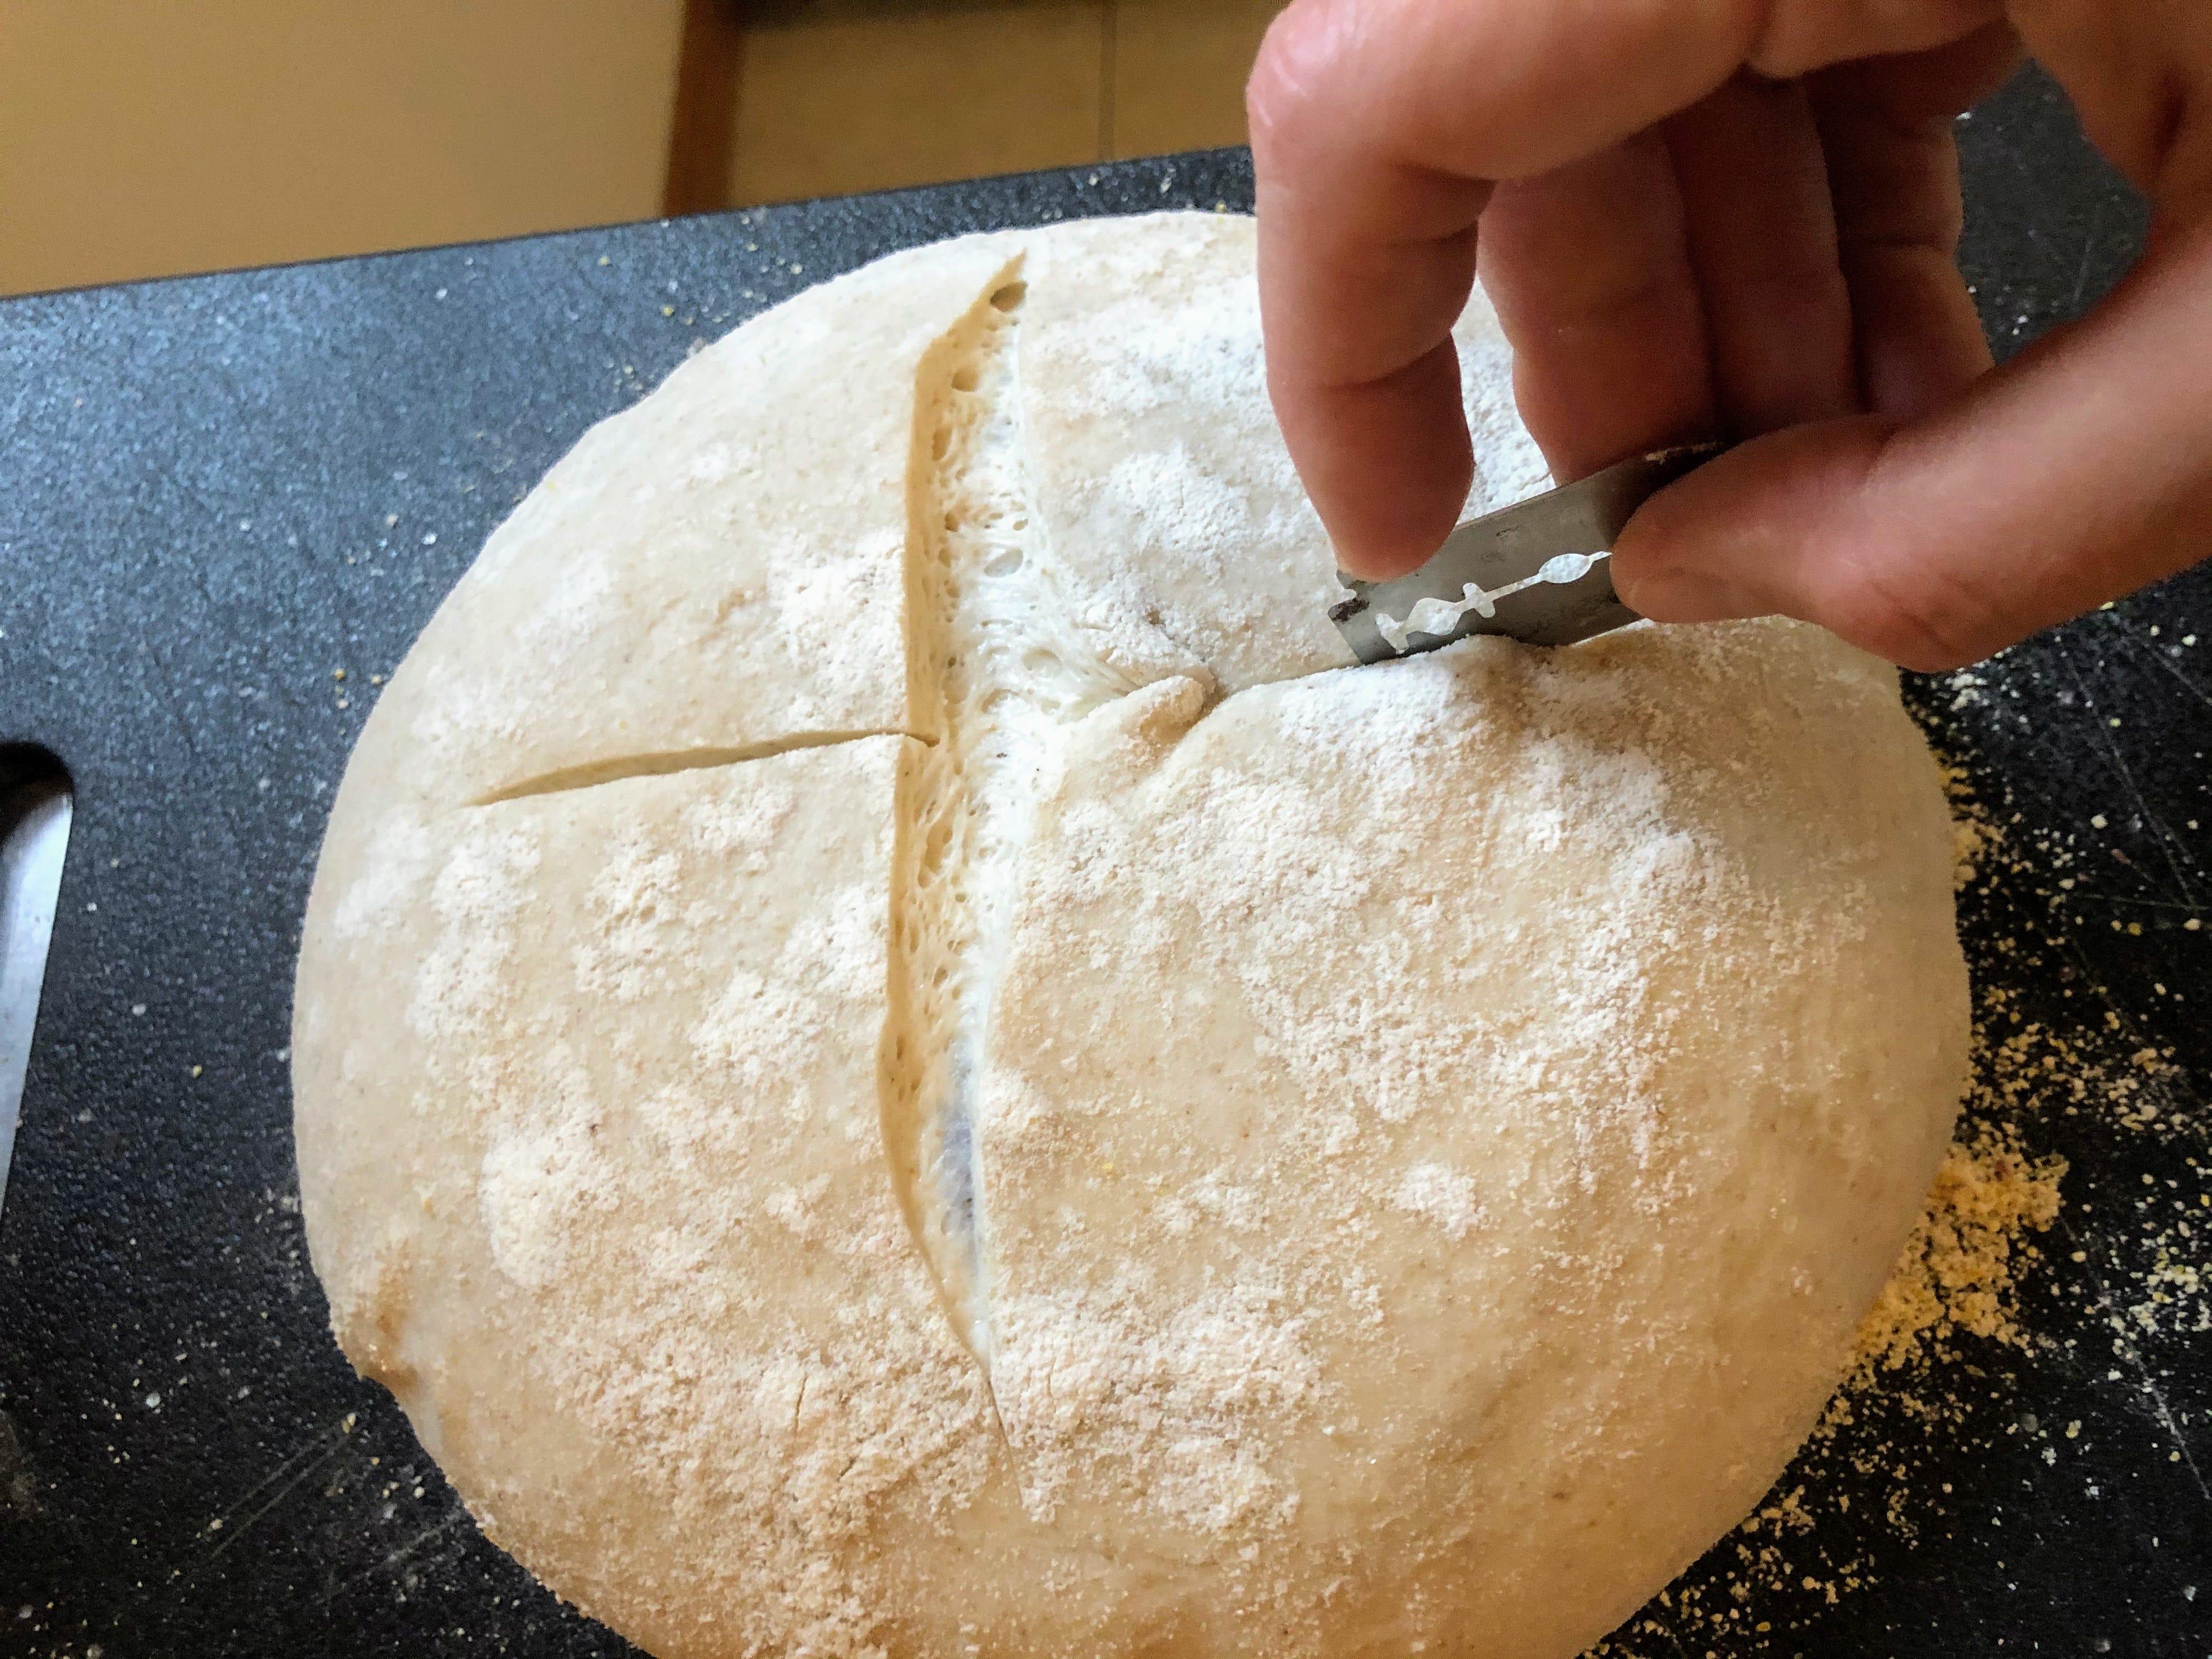
9. Prepare the dough to bake: Take the proofing basket out of the fridge and generously sprinkle with cornmeal. Place a cutting board on top of the basket and flip it, then lift the banneton/bowl and the cloth (if using) away. Score the bread with a razor or cut with a serrated blade (or super, SUPER sharp knife if you have one; mine are always too dull for this!), about 1/2 inch deep. I recommend an X pattern, especially for those just getting started.
10. Put the dough in the oven: Take the Dutch oven out of the oven and transfer the scored dough into the Dutch oven. Spray the dough with water, or flick water from your fingertips. I usually do 3 squirts. Cover with the lid.
This step introduces steam into the baking vessel. Water evaporates from the dough skin as it bakes, which gives it that blistered, shiny look and deep brown color. If you don't have a Dutch oven, you can approximate this effect by placing a cake pan full of boiling water on the bottom rack of your oven.
11. Bake: Bake for 20 minutes at 500 degrees, then remove the lid and lower temp to 450 for another 20 minutes.
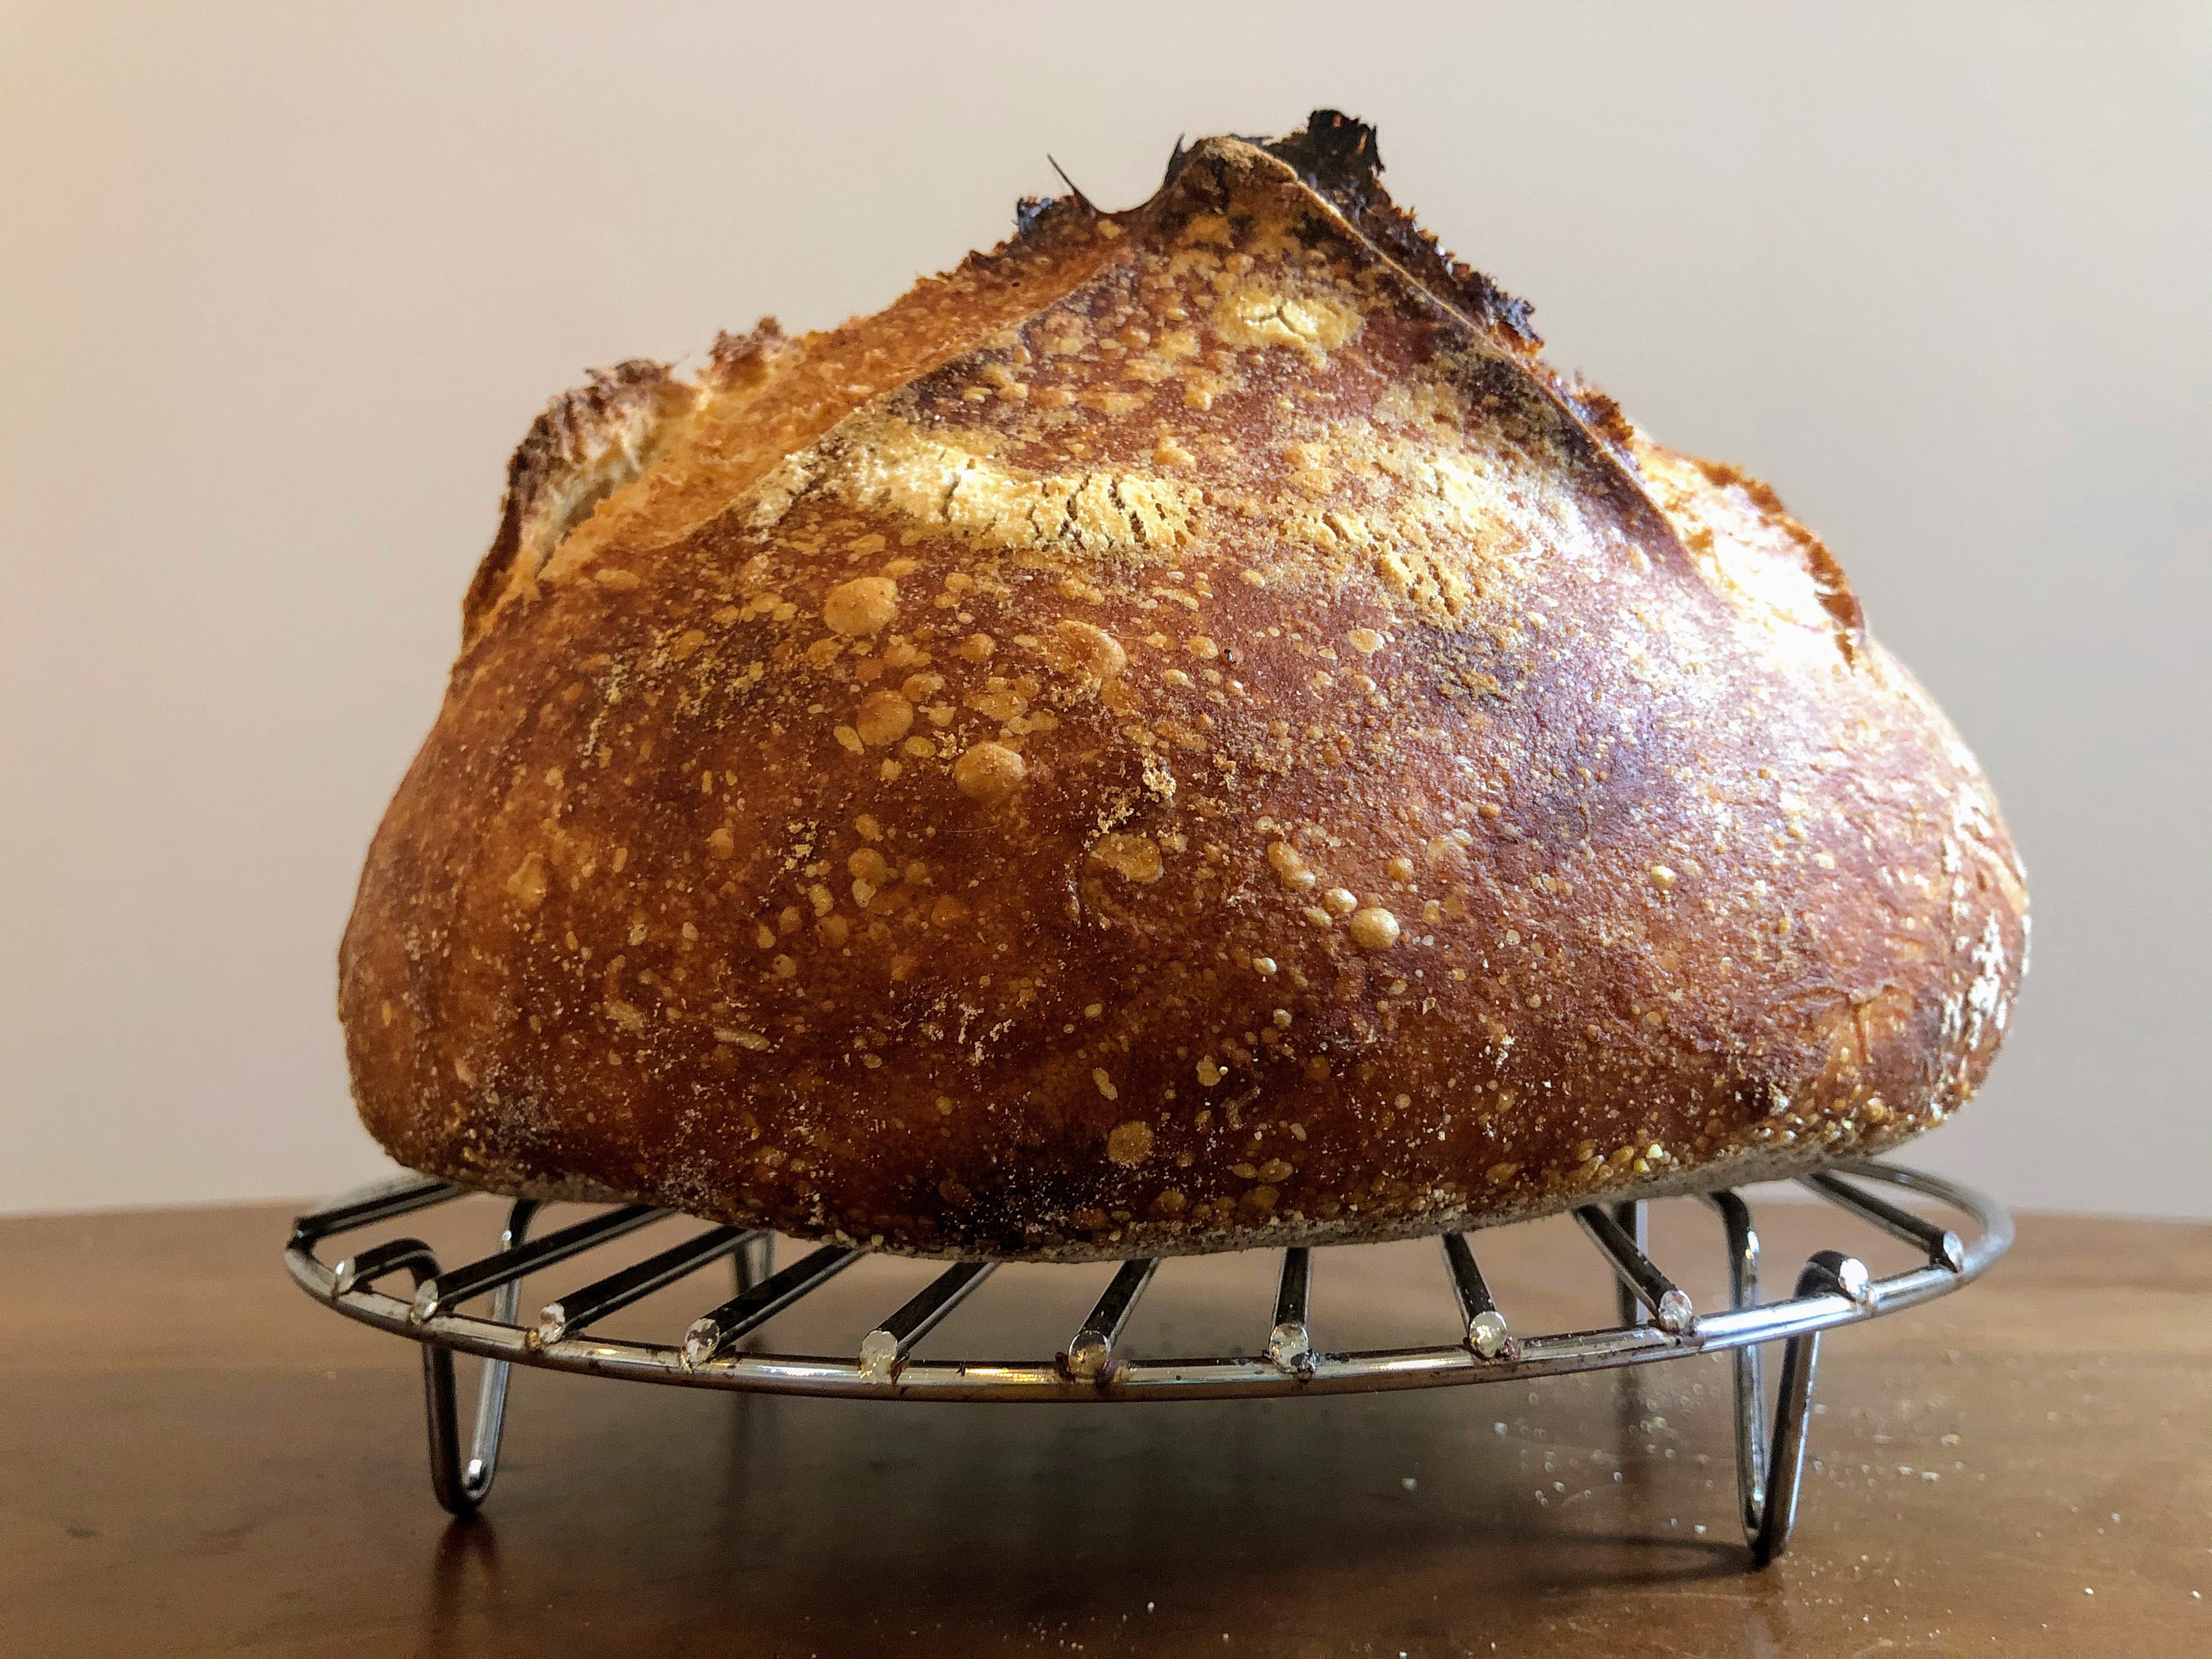
12. Patience is a virtue: Like many foods, bread keeps cooking after you remove it from direct heat--steam and heat trapped inside the crust continue to firm up the dough in the center of the loaf after it’s removed from the oven. I can’t tell you how many times I’ve cut into a loaf of fresh bread because I couldn’t control myself, only to end up with a gummy, still-kind-of-doughy slice.
Let it cool for at least 2 hours and enjoy!